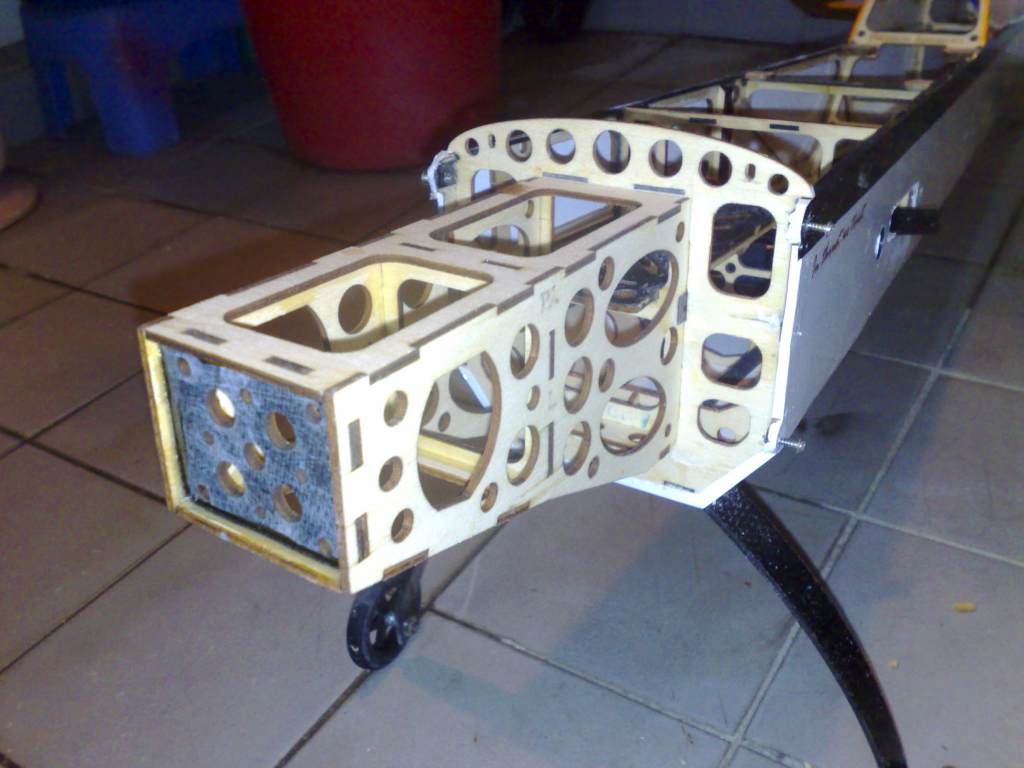
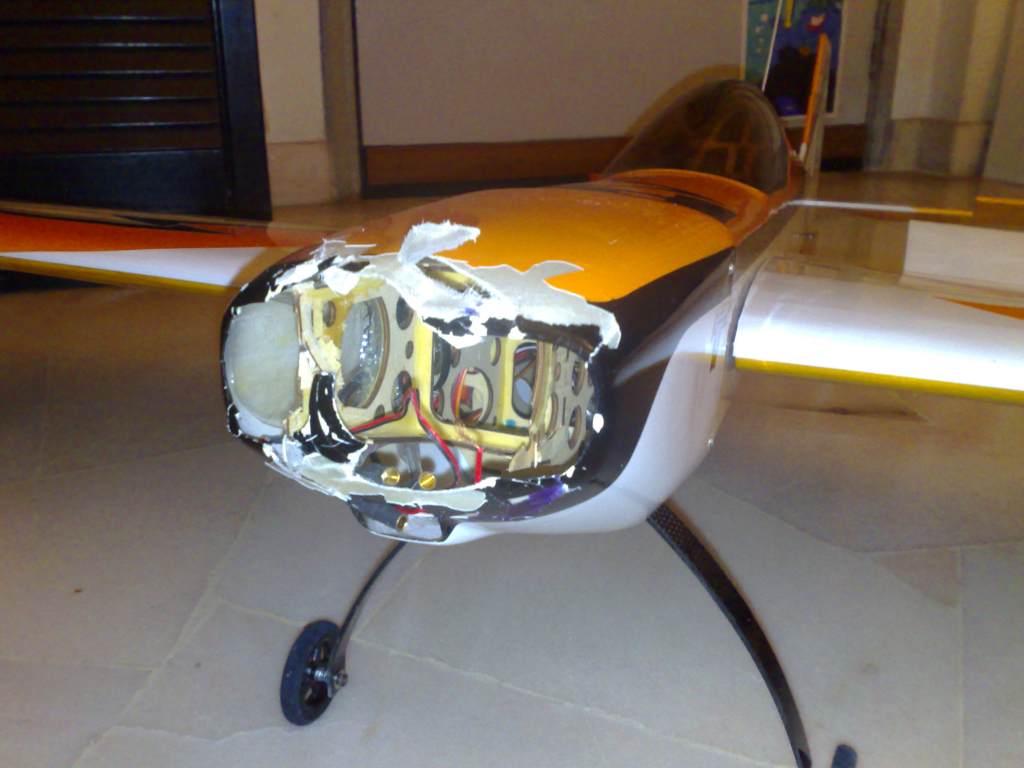
This type of damage is not as bad as it seems and its quite repairable. These things happens for a number of reasons such as:
1.The use of excessive force when inserting the motor mount into the fuselage during the build.
2. Accidental knocks during transportation
3. Extremely high-G maneouver over-stressing the airframe (due very violent maneouver at excessive speeds). I have actually witnessed the wings of a 50cc gasser disintegrating during a full speed hard snap roll about a month ago.
4. Broken or missed glue joint
5. Slightly off-true prop adapter
6. Slightly off-true prop hole (usually goes undetected during prop balancing)
7. Slight difference in prop pitch between the two blades (after balancing by sanding)
8. Bent motor shaft
9. Worn out motor bearings
10. Tiny cracks in the ply
11. Repeated minor nose-in or prop strikes over time.
So there are many ways to cause a motor mount to break.
I have broken my motor mount after cartwheeling my MD on several occations, one due to an imbalanced prop and another during a mid-air collission and replacing the motor mount is a pretty simple process which I would like to share and there is no need to junk a perfectly good airplane.
To replace your motor mount, the following tools are needed. Just follow the attached photographs and you will be able to replace your damaged motor mount with the minmum of fuss and it will be as good as new :
1. Dremel (rotary tool) with a flex unit
2. Dremel Sanding drum
3. Dremel needle tip grinder
4. Wire cutter
5. Sanding block
6. Replacement Motor Mount (Available from PA)
7. Replacement Cowl (available from PA)
8. Drill
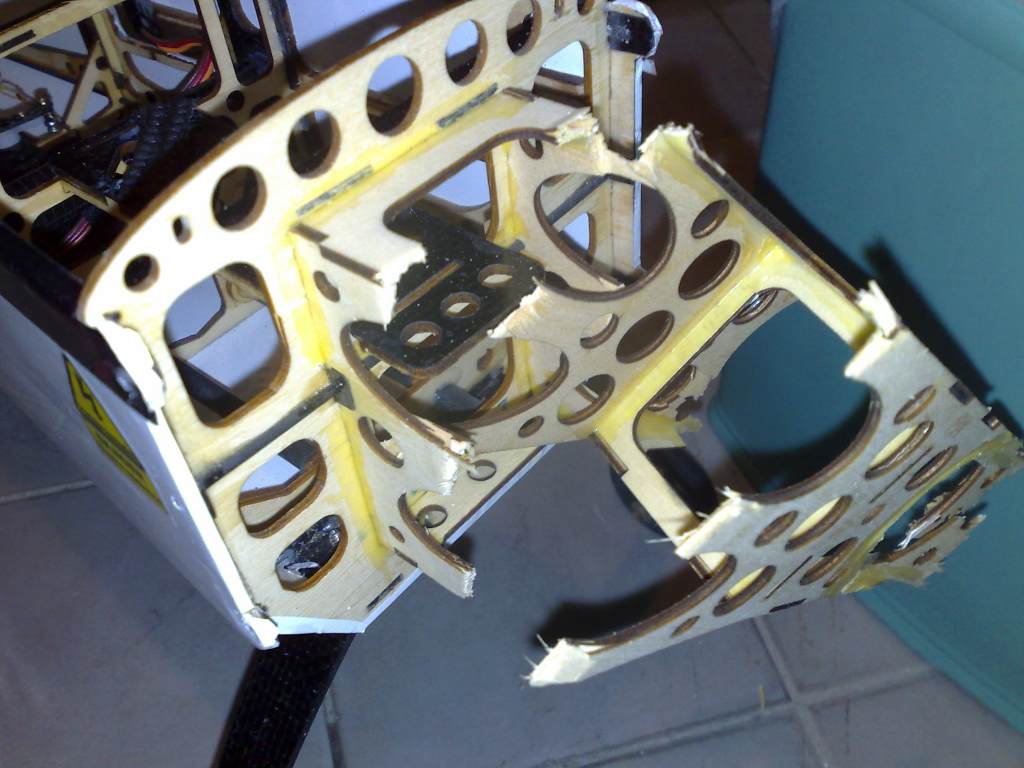
Depressing looking carnage.
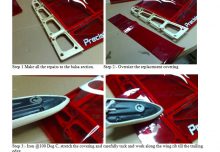
Step 1:- Remove the damage cowl and clean up any debris.
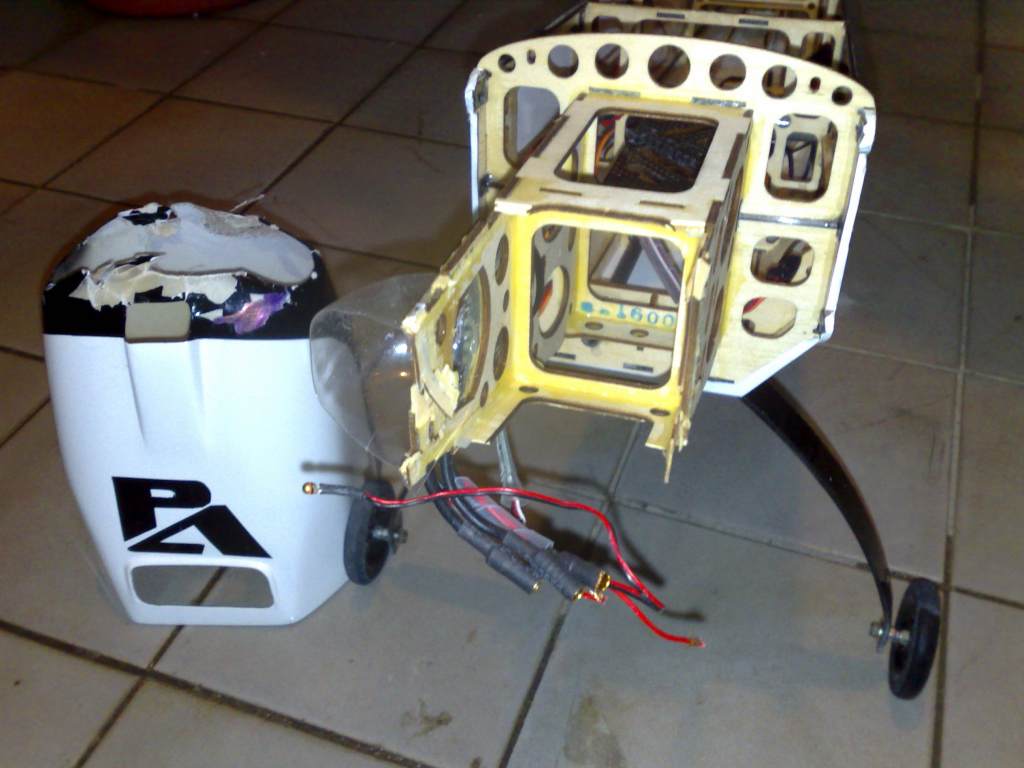
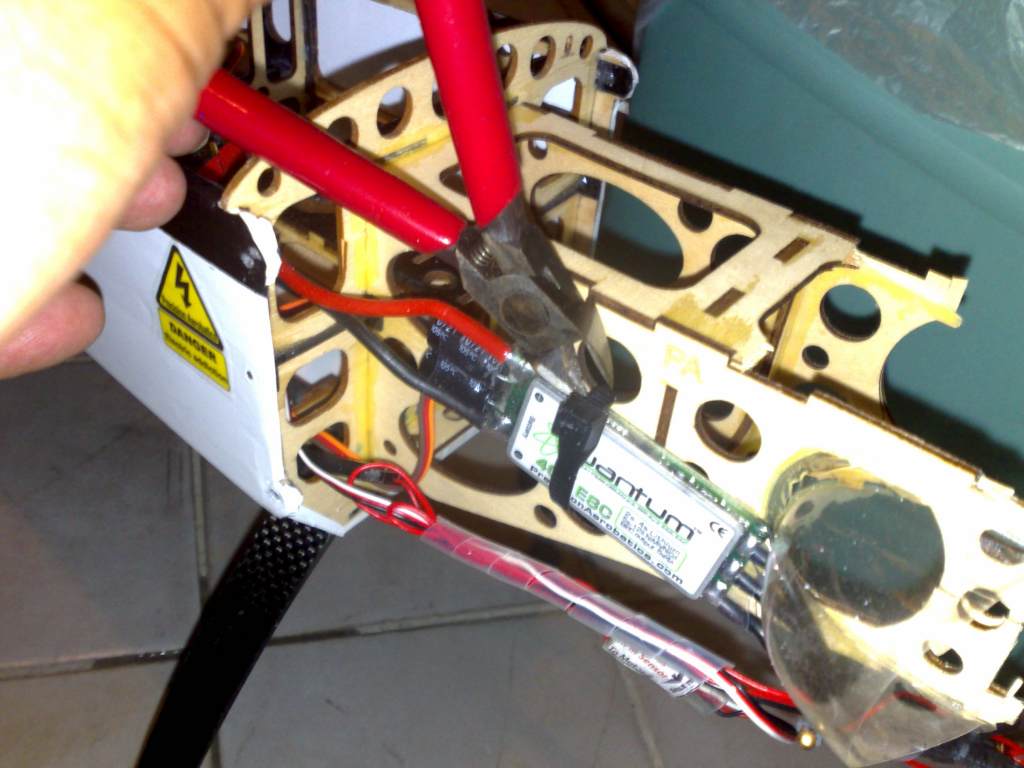
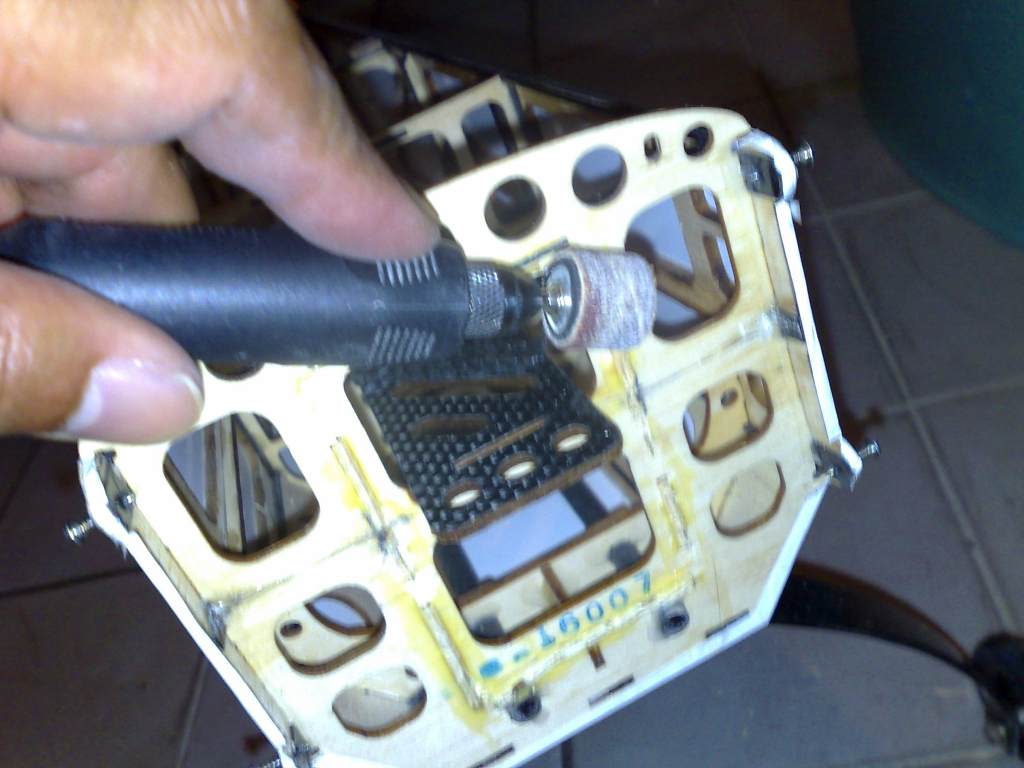
Step 2:- Remove the ESC.
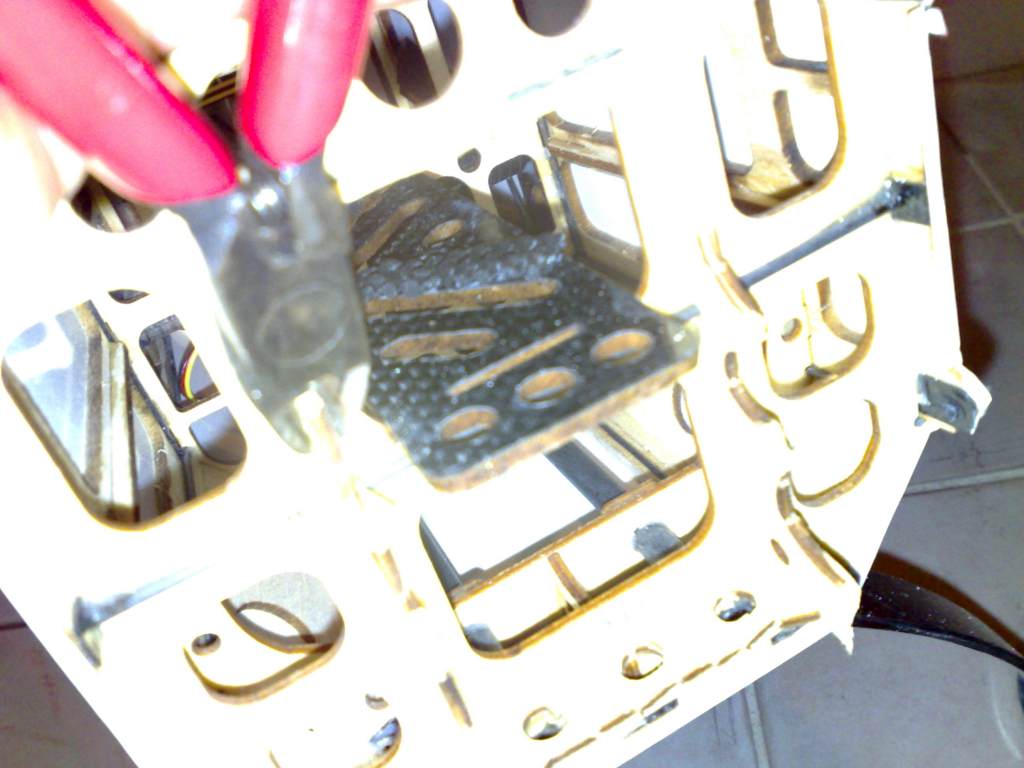
Step 3:- Use a wire cutter to cut away a major portion of the damaged motor mount. (Best to cut at the narrowest part of the lightening holes closest to the firewall)
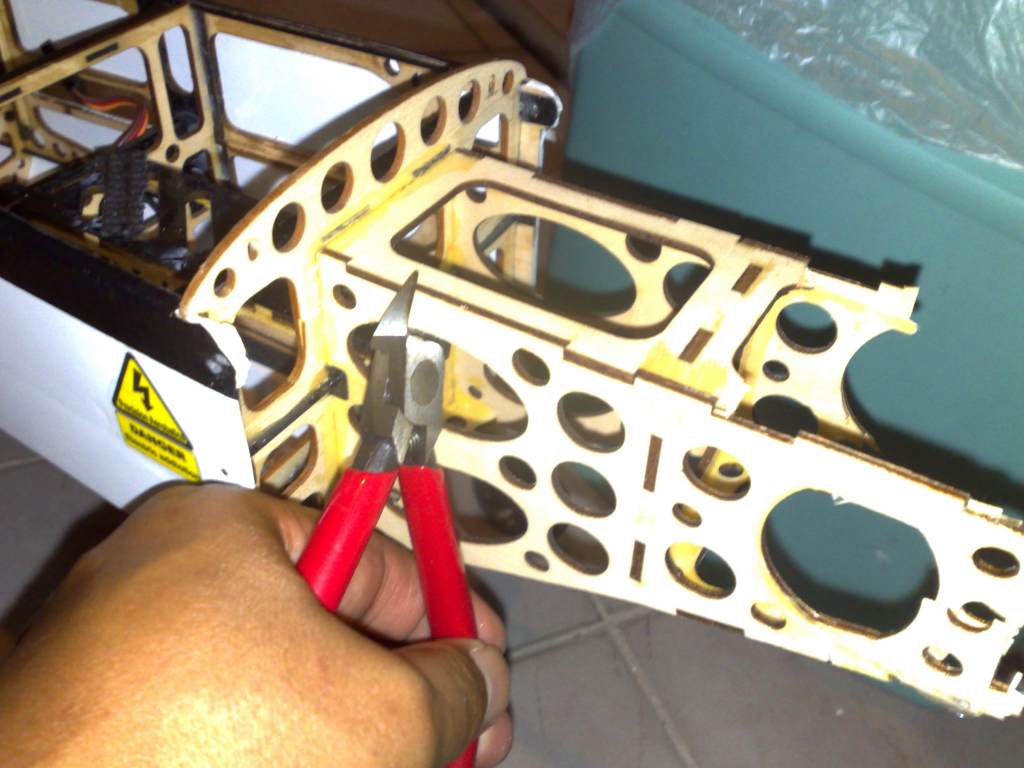
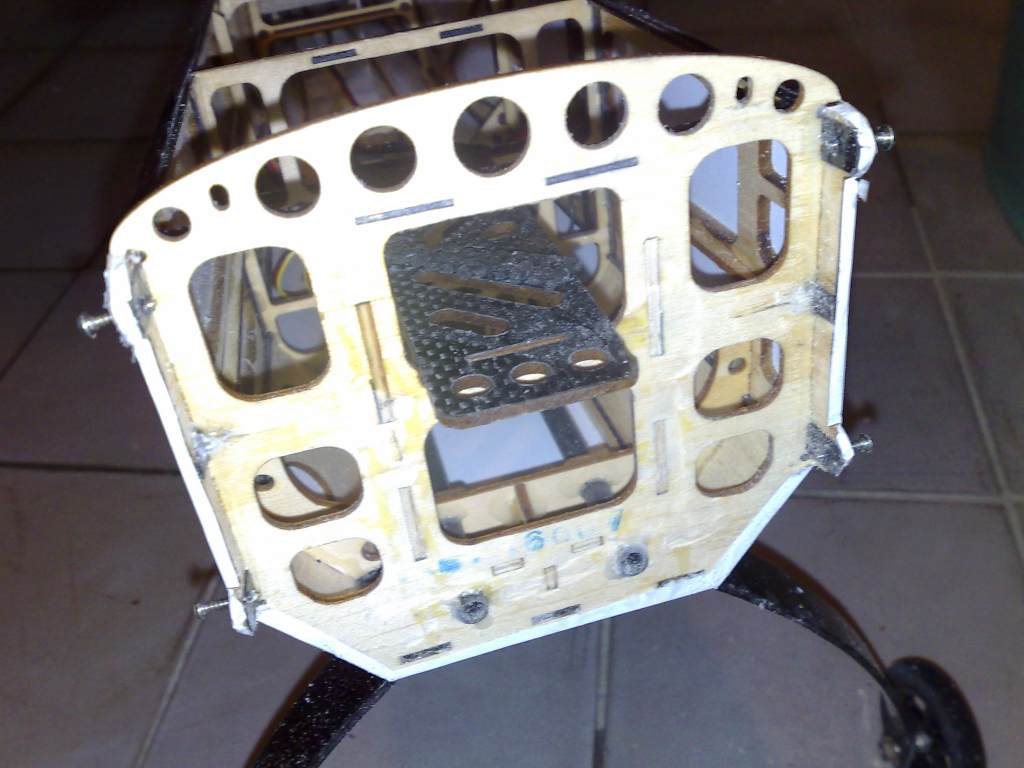
Major section of the motor mount removed.
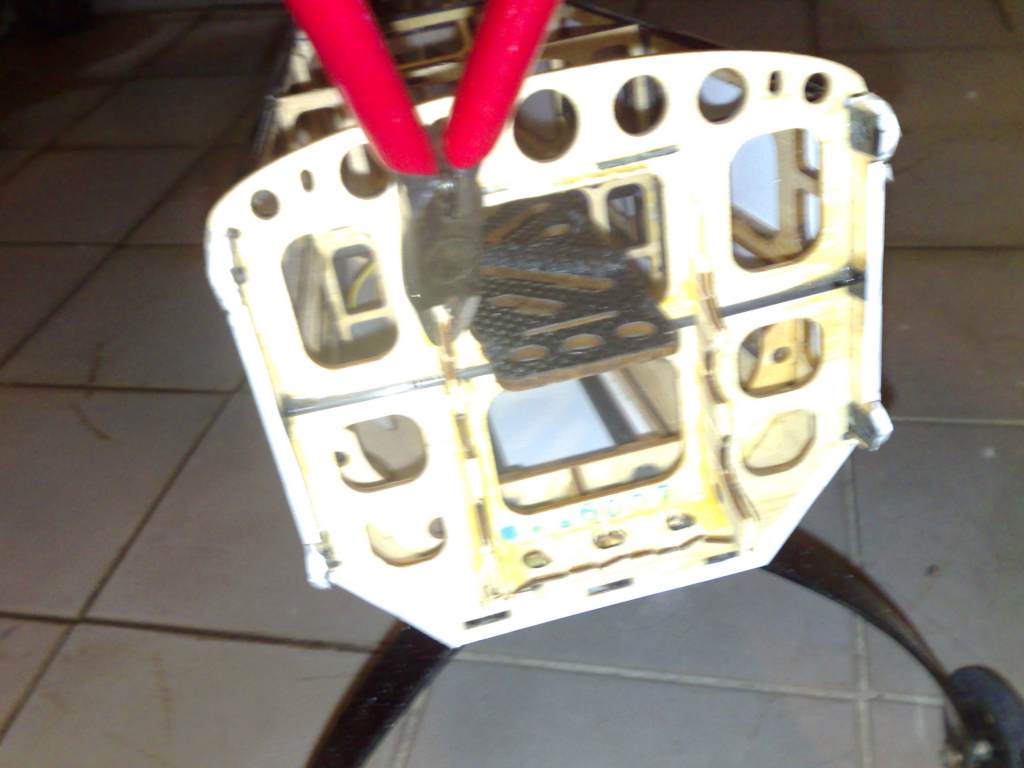
Step 4:- Use a wire cutter to make multiple small cuts perpendicular to the firewall. (To ease cutting away excess bits in step 5)
Step 5:- Cut excess bits flush with the firewall. (Cut as flush as possible to minimise sanding later
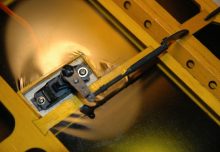
Step 6:- Cut away the motor mount tabs holding the CF rod.
Step 7:- Cut away the CF rod at the front of the firewall.
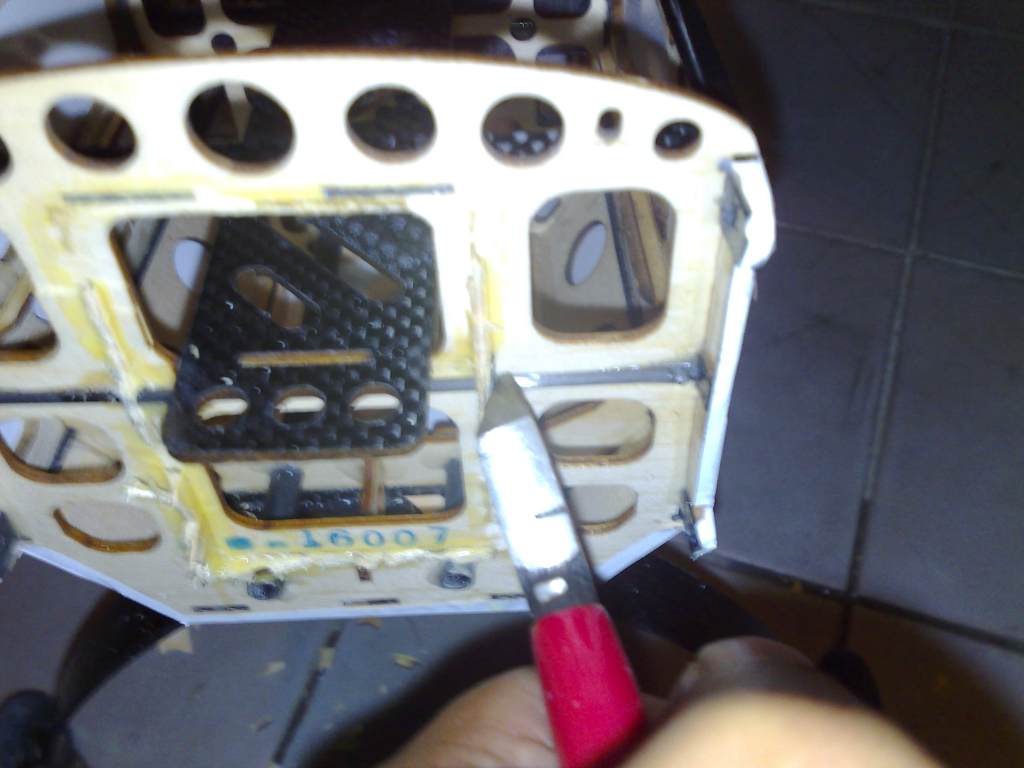
Step 8:- Cut away the CF rod at the rear of the firewall.

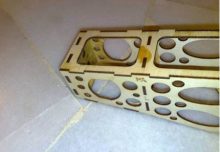
Step 9:- Use a sanding disk and carefully sand down the excess ply until it is fully flushed with the fire wall. Just sand enough until you are able to see the outline of the tab slots.
You should be able to see the outline of the tab slots when it is flushed. (Do not sand any further)
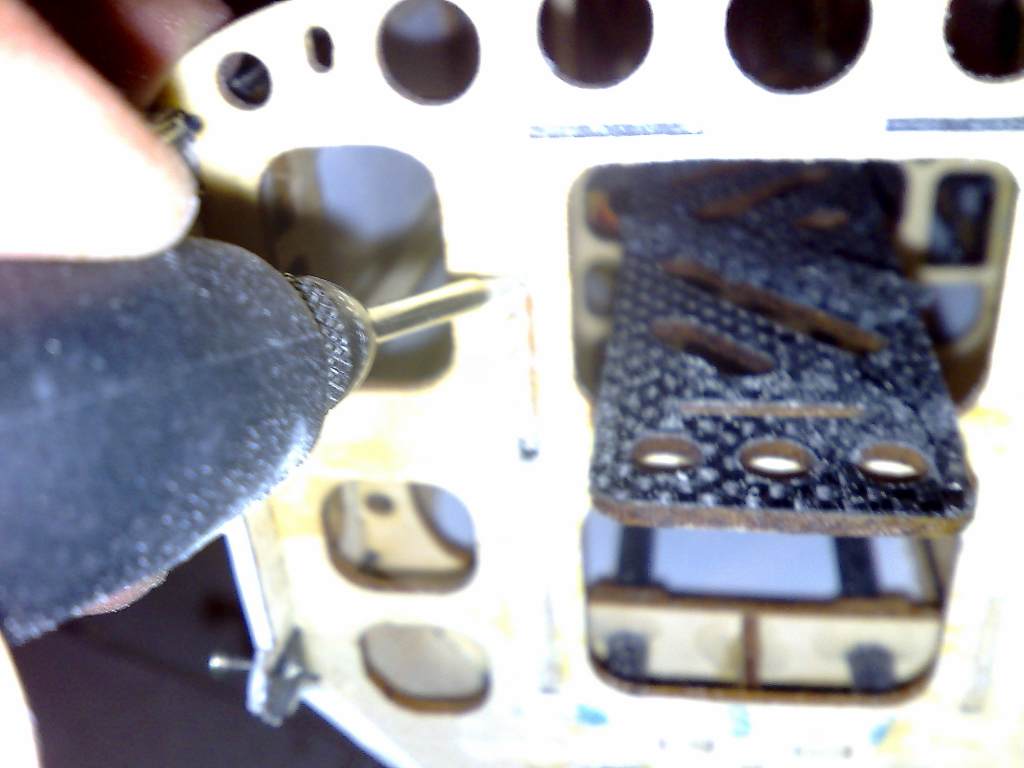
Step 10:- Use a needle tip grinding bit to “drill” out multiple holes inside the tab slot.

Step 11:- Use a needle tip grinding bit to carefuly cut between the holes and clean out the tab slot and cleanup with a sanding block or jeweler’s flat file.
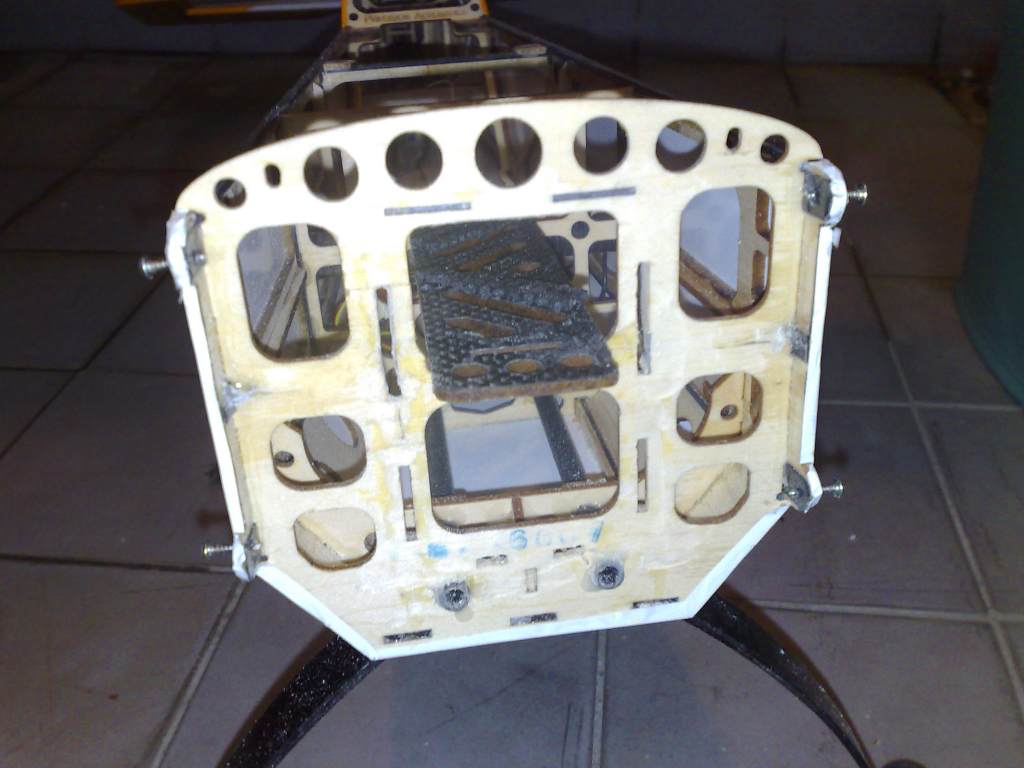
Tab slots all cleaned out. Use a sanding block and sand the firewall to make it as flat as possible (This is to minimize the gap between the firewall and the new motor mount to ensure a strong glue joint with minimum glue). Do not over sand.
Step 12:- Reinstall the new motor mount and insert the new CF rods and the motor mount is ready to accept the motor and you are done!